When a group chat has served its purpose, then it may be time to delete it. Once a group chat is deleted, all conversations, files, links, and anything shared on it are deleted and are non-recoverable. If you want to learn how to delete group chat on Facebook Messenger, then this article can help you.
The Facebook Messenger app offers everybody to create a group chat. Group chats are designed to reach and communicate with more of your friends easily. They work as a common chat room where members are able to see every member’s message. It’s quite easy to create a group chat but it takes an effort to delete one.
The creator of the group chat is the only person responsible to delete it. If you are one of the creators, this article is for you. If you are one of the members, you may share this with the creator.
Delete Group Chat on Facebook Messenger
If you are the creator or an admin of a Messenger group chat, you can delete the group chat by following these steps:
1. Launch the Facebook Messenger app.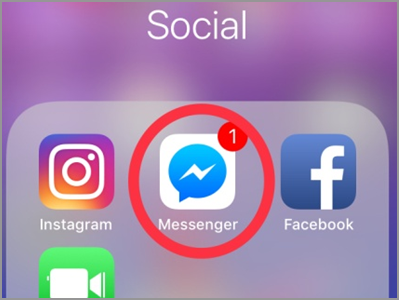
2. Under the Search box, tap the Groups tab. It’s in line with the Message, Active, and Calls tab.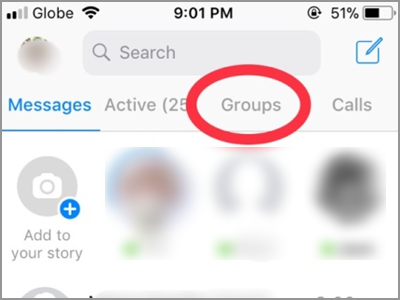
3. Select the Group you want to delete. Remember, you must be the admin or creator of the group chat.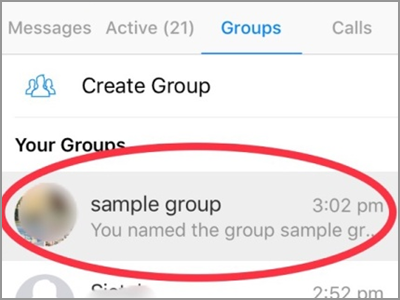
4. Tap the Group Name to open its menu.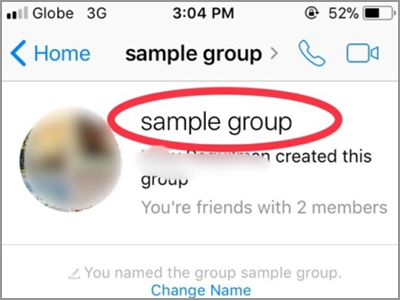
5. The screen will display the different settings and options regarding your group chat. Scroll down and look for all the members. Do not be confused by the Ignore Group and Leave Group option. From this part, it needs your patience and efforts as you have to manually remove all the members one by one. If you only have few friends in the group, then the task should be a breeze. The next steps will show you how to remove members.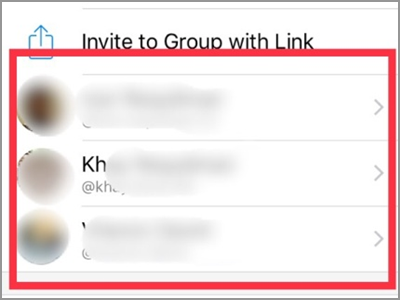
6. Tap the member’s name to make the other options available.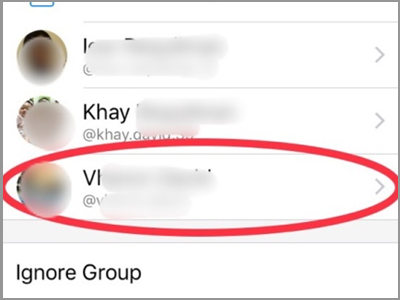
7. Under the member’s name and facebook link, there are four options. These are the Message, Audio Call, Video Chat, and View Facebook Profile. While on the bottom part you will only see the Remove from Group and the Block option. Tap the Remove from Group.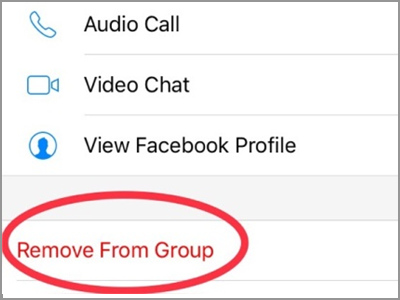
8.. Confirm your action by tapping the Remove button. Do the Step 6 up to Step 8 for all the members. Do these until it remains only the creator. Then follow the next step.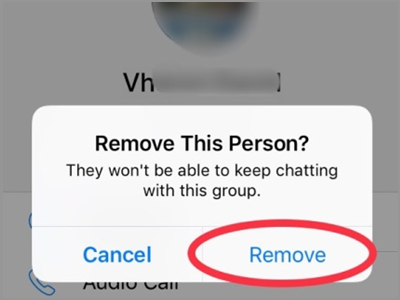
9. Now it’s the time for you, the creator, to leave the group. There are two ways to access the Leave Group option. Tap your name from the list.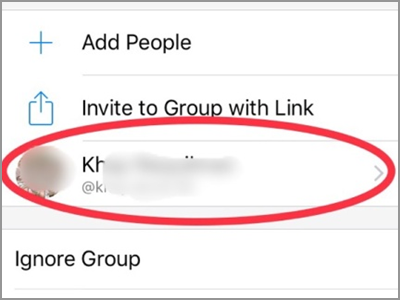
10. From the member list, scroll down a little bit. You will find the Leave Group tab after the Ignore Group.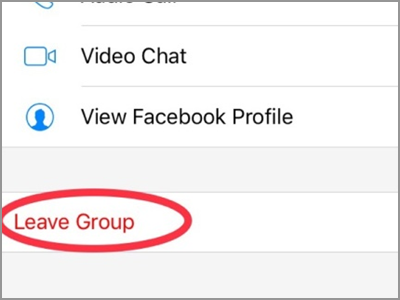
● Alternatively, on the bottom part of the screen, you will see the Leave Group button. This option is only available on the creator’s page.
11. Tap the Leave button to confirm. After the confirmation, your screen will be back on the Group page.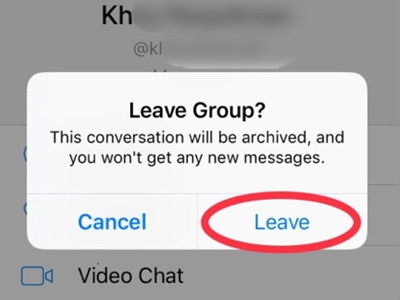
2. Under the Search box, tap the Groups tab. It’s in line with the Message, Active, and Calls tab.

3. Select the Group you want to delete. Remember, you must be the admin or creator of the group chat.

4. Tap the Group Name to open its menu.

5. The screen will display the different settings and options regarding your group chat. Scroll down and look for all the members. Do not be confused by the Ignore Group and Leave Group option. From this part, it needs your patience and efforts as you have to manually remove all the members one by one. If you only have few friends in the group, then the task should be a breeze. The next steps will show you how to remove members.

6. Tap the member’s name to make the other options available.

7. Under the member’s name and facebook link, there are four options. These are the Message, Audio Call, Video Chat, and View Facebook Profile. While on the bottom part you will only see the Remove from Group and the Block option. Tap the Remove from Group.

8.. Confirm your action by tapping the Remove button. Do the Step 6 up to Step 8 for all the members. Do these until it remains only the creator. Then follow the next step.

9. Now it’s the time for you, the creator, to leave the group. There are two ways to access the Leave Group option. Tap your name from the list.

10. From the member list, scroll down a little bit. You will find the Leave Group tab after the Ignore Group.

● Alternatively, on the bottom part of the screen, you will see the Leave Group button. This option is only available on the creator’s page.
11. Tap the Leave button to confirm. After the confirmation, your screen will be back on the Group page.

Tip: Anyone who is a member of the group chat can also remove a co-member.
0 comments:
Post a Comment