How to Delete a Facebook App on iPhone, iPad: You can download and also decide to delete your Facebook app on your iPhone at anytime you want without any qualms. It's your device and you've got every right to install and delete any app that you choose to.

In this recent Learn Facebook Basics tutorial, we'll see how to delete and where to install your Facebook app whenever you choose to reinstall it.
How to Delete Facebook app on iPhone and iPad
To uninstall the Facebook app from your iPhone or iPad:
- Press and hold the app icon
- Tap the x that appears
- To confirm, tap Delete
To reinstall the Facebook app on your iPhone or iPad, download it from the iTunes App Store.
Search: delete what happens if i delete facebook app on iphone, delete facebook account from iphone settings, reinstall facebook app on iphone, how to delete facebook app from iphone 7, delete facebook app android, how to deactivate facebook on iphone app, delete facebook app developer, uninstall facebook android
That's is it... hope you were able to uninstall Facebook app from your mobile device. Please share this article or leave us with your comment if you find any step confusing.


![How To Log Yourself Out Of Facebook On Other Devices And Improve Your Security [Weekly Facebook Tips] Facebook Account Settings](https://static.makeuseof.com/wp-content/uploads/2012/08/Facebook-Account-Settings.png)
![How To Log Yourself Out Of Facebook On Other Devices And Improve Your Security [Weekly Facebook Tips] Facebook Active Devices](https://static.makeuseof.com/wp-content/uploads/2012/08/Facebook-Active-Devices.png)
![How To Log Yourself Out Of Facebook On Other Devices And Improve Your Security [Weekly Facebook Tips] Facebook Recognized Devices](https://static.makeuseof.com/wp-content/uploads/2012/08/Facebook-Recognized-Devices.png)
![How To Log Yourself Out Of Facebook On Other Devices And Improve Your Security [Weekly Facebook Tips] Facebook Login Approval](https://static.makeuseof.com/wp-content/uploads/2012/08/Facebook-Login-Approval.png)
![How To Log Yourself Out Of Facebook On Other Devices And Improve Your Security [Weekly Facebook Tips] Facebook Login Notifications](https://static.makeuseof.com/wp-content/uploads/2012/08/Facebook-Login-Notifications.png)
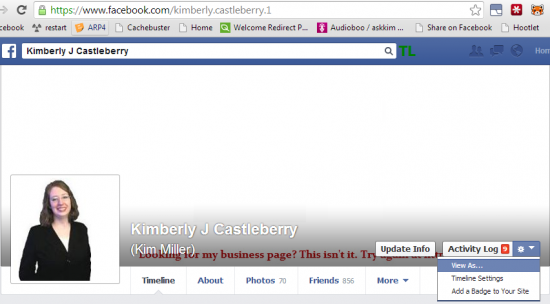
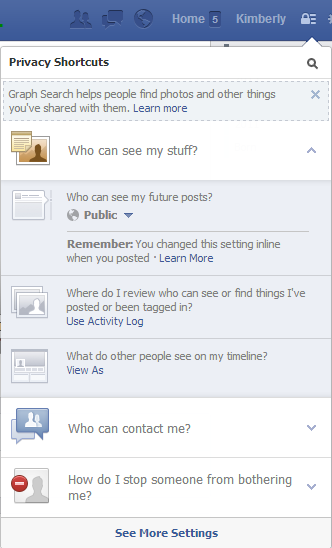
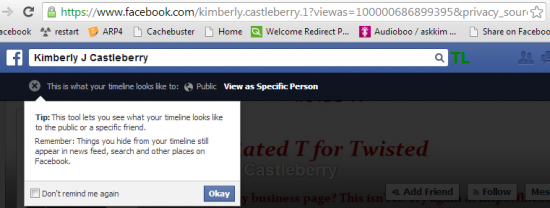
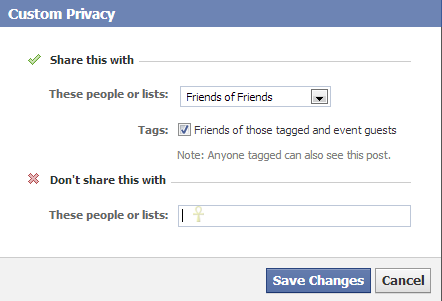
 .
. Settings.